What is a README File?
A README is a text file that introduces and explains a project. It contains information that is commonly required to understand the project's purpose.
When you create a repository or a project, GitHub gives you the option of a default readme. The default readme file contains the repository name and some basic instructions. The file format is ‘md’, which stands for Markdown documentation. It is a lightweight markup language that can be easily converted to text. For more about the Markdown component, Click Here.
What is Markdown(.md file)?
The markdown can be converted into other formats (such as HTML) and incorporated into many things. It’s the standard format for ReadMe files in Git.
John Gruber of Daring Fireball (daringfireball.net) created Markdown. He says, “Markdown is intended to be as easy-to-read and easy-to-write as is feasible. Markdown’s syntax is intended for one purpose to be used as a format for writing for the web.”
Why is a README File necessary?
GitHub has become the platform where most open-source code is shared as the world is pushing more and more towards open-source projects and code. When sharing your code with the world, a problem that might occur is that they may not particularly understand how to use it or even understand it. So that is where the readme file helps. The readme file is used to explain what is uploaded and how we can install or use it. It even allows the uploader to add images and videos to help the reader navigate through the project. A well-written readme file is more important if you intend to show these projects in your resume. The interviewer might go to your project but might not understand a single piece of code. But if there is a readme file, it will help him/her understand better what the project is for, which coding languages/frameworks were used, and how to navigate through that project. A good readme file for your project goes a long way in making an impression in your interview. An unsaid thing about readme files is that they even help your future self. For example: If, for some reason, a bug was found a few months after you left the project, and the company or the team asks you to fix it. You are completely out of touch and have no clue where to start looking. A readme file comes in handy in this scenario.
Effective tool to create Readme Files Quickly & Easily
Creating a GitHub Profile README
The README file resides in a GitHub repository, the name of which is the same as the username of your GitHub account. To create the repository, follow these steps:
Log in to GitHub.
Click on the + icon at the top right of the page and select New Repository.
A Create a new repository page opens. In the Repository name field, enter the username of your GitHub account. After entering the username, GitHub displays a message describing that you’re about to create a GitHub special repository.
Check the Public checkbox under repository type to make the GitHub profile README visible to everyone who visits the GitHub profile page. If you don’t want users to see your GitHub profile README while it’s still in development, you can choose Private. Once you’re done with the complete development of your README, make sure to change the visibility to Public.
Check the Add a README file checkbox. This will add a
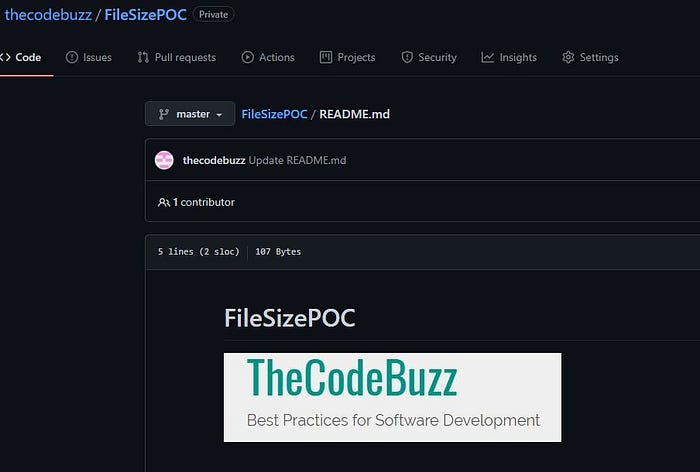
README.mdfile where we’ll add the profile contents. The field values should look similar to the picture below.Click on the Create Repository button. A special repository is created successfully. Go to the repository you just created and you’ll see a
README.mdfile added to the repository.
In the next few sections, we’ll add contents to our README.md file. We’ll use GitHub’s file editor to write and preview the changes. You can use any other text editor you’re comfortable with.
To use the GitHub file editor, open README.md and click on the Edit this file icon (a pencil icon) on the top right of the page. You can read more about editing GitHub files at the official GitHub documentation on editing files.
What should a readme file contain?
Depending on the purpose of a readme file, the following content in particular may be relevant:
A general description of the system or project
The project status is important if the project is still in development. Use the file to mention planned changes and the development direction or indicate the completion date of the project.
The requirements on the development environment for integration
A guide to installation and use
A list of technology used and any links to further information related to this technology
Open-source projects that the developers independently modify or expand should be contained in a section on “desired collaboration” in the readme.md file. How should problems be handled? How should developers advance the changes?
Known bugs and any bug fixes
FAQ section with all previously asked questions
Copyright and licensing information
How to manage text on a readme?
The text should include the titles of sections, and — if necessary — the internal titles. To keep our README coherent, we write them similarly in every other document. In our README.md file, the headings should be written down with a multiple of #:
# header H1
## header H2
### header H3
#### header H4
##### header H5
###### header H6
How to add colors to the readme file?
/*add and display colors to readme.md files:*/
/* Squar Colors: */
-  `#f03c15`
-  `#c5f015`
-  `#1589F0`
/* Rounded(Circel) Colors: */
-  `#f03c15`
-  `#c5f015`
-  `#1589F0`
/* in the last one you can go to the website and change the shape to what ever you want
and copie the link the the img and add it to your README.md*/
Output will look like as below:

How to Add an image in a readme file?
You can add an image as a banner, a gif, a dynamic svg, or anything that you like. Images and gifs are a great way to embed some flair into your profile. They are also super easy to add. You can now drag and drop GIFif or images directly into markdown.
If you’d like a little more control over your image, however, use this snippet of code:
<a href="URL_REDIRECT" target="blank"><img align="center" src="URL_TO_YOUR_IMAGE" height="100" /></a>
Here’s what each of the elements do:
a hrefAllows you to link to any URL. If you don't want to link to anything, you can remove thehrefif you like, or just leave the URL blank and you can come back to it later.target="blank"This means the URL you linked to above will open in a new tab.img align="center"Will make your image justified to the center. You can use "left" or "right" too.srcThis is the URL where your image can be found. You can make this a public URL, but I highly recommend uploading your image to GitHub as you can guarantee your image will always live at that URL.heightIs the height of your image. You can also use "width". The height or width is useful for ensuring all your images have the same dimensions.
Add Image to Readme. md file can be done using the below pattern
Common pattern


1. Using the Markup attribute
One can add images using![alt text] markup attribute as below,

2. Using Custom Markup
You can also use any custom names Ex. ![image] or![thecodebuzz] markup to add an image to your documentation.

How to GET image URL or Path?
The path or url to the image file can be a relative path or the absolute path in Git or TFVC
Above we have used an image link that is easy to get from the git repository.
Please upload the required images to the repository at any of the paths.
Right-click on the image and copy the image link address.

That’s all, once the image link is added, you can see documentation with the required image to your documentation.
That’s all, once the image link is added, you can see documentation with the required image to your documentation.

Resize the image README.md
Pattern :
IMAGE_URL = WIDTH x HEIGHT
[](https://thecodebuzz.com/how-to-add-image-to-excel-files-using-npoi/)
3. Add an image with a link in README.md
You can also add an image with a link to Github’s README.md file.
You just need to define your markup with the source URL/Link.
[`).`
4. Image as a banner with a link
Code snippet:
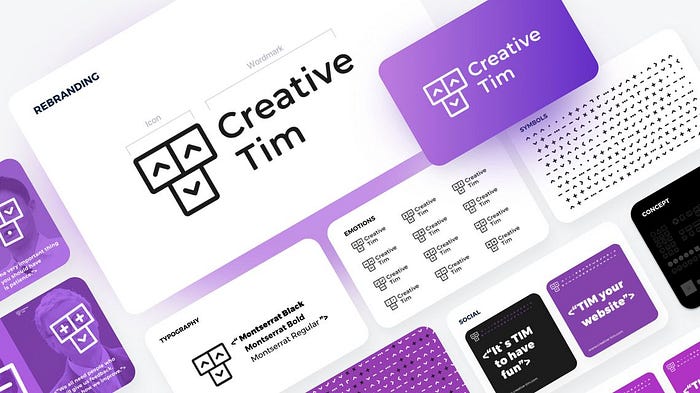
[](https://www.creative-tim.com/)
Example Preview:

Insert header with a gif in your readme
Example Preview:
Hi there ✋!
Code snippet:
Hi there ✋!
Add JSON block to Git Readme file
JSON can be embedded in the markup readme file using multiple ways. Below we will see a few simple approaches to adding JSON to readme.md file.
Add JSON to Git Readme
Syntax
```json

Your JSON here

```
Example
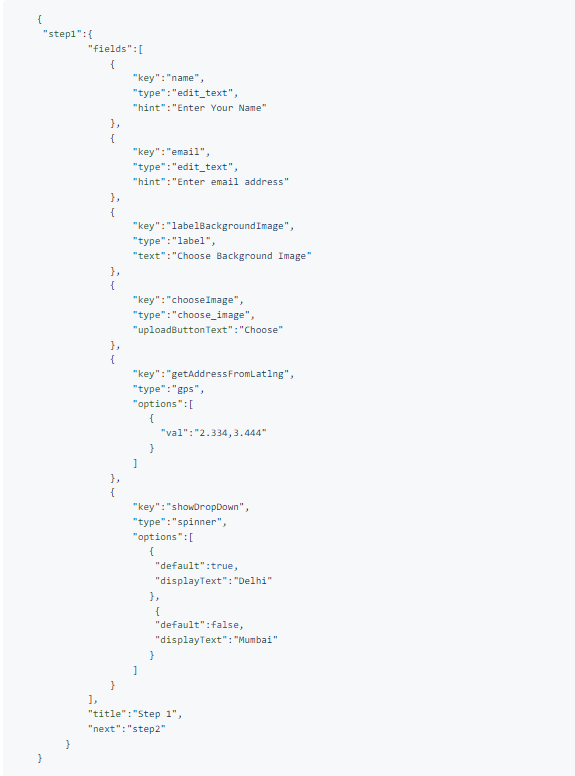
Below is a sample example,
```json

    {
     "step1":{
             "fields":[
                 {
                     "key":"name",
                     "type":"edit_text",
                     "hint":"Enter Your Name"
                 },
                 {
                     "key":"email",
                     "type":"edit_text",
                     "hint":"Enter email address"
                 },
                 {
                     "key":"labelBackgroundImage",
                     "type":"label",
                     "text":"Choose Background Image"
                 },
                 {
                     "key":"chooseImage",
                     "type":"choose_image",
                     "uploadButtonText":"Choose"
                 },
                 {
                     "key":"getAddressFromLatlng",
                     "type":"gps",
                     "options":[
                        {
                          "val":"2.334,3.444"
                        }
                     ]
                 },
                 {
                     "key":"showDropDown",
                     "type":"spinner",
                     "options":[
                        {
                         "default":true,
                         "displayText":"Delhi"
                        },
                         {
                         "default":false,
                         "displayText":"Mumbai"
                        }
                     ]
                 }
             ],
             "title":"Step 1",
             "next":"step2"
         }
    }
  ```
Below is how the final JSON looks like in the Git used with ADO, GitH,,ub or GitLab

How to add social Badgesa in the readme file?
One of my goals with my GitHub profile README is to direct visitors to my other social networks (Twitter, LinkedIn, and CodePen, specifically).
To do that, I made sure I had social badges listed at the top of the profile so that it’s one of the first things visitors see.
To create these badges, I used shields.io and edited the badge text, badge cor, and destination URL.
I thought it would also be fun to keep track of my profile visits, so I created a badge and listed it next to the social badges.
To create your own visits badge, copy the ‘Visits Badge’ markdown content below and change the repository destination in the URL (everything after ‘/visits/’).
[](https:braydoncoyer.dev)
[](https://twitter.com/BraydonCoyer)
[](https://www.linkedin.com/in/braydon-coyer/)
[](https://codepen.io/braydoncoyer)
Where to find social icons
Speaking of cool images. You might have noticed a lot of people have some pretty slick-looking social icons on their profiles. Mine for example has a bunch of sleek social media and gaming icons.
Where can you find these? There are a couple of places to look:
Simple Icons are a really good place to start. They have hundreds of free vector icons and they are always updating them. Plus it’s all open source!
Flaticon has a lot more color icons to choose from. There are various artists here so you’ll find that not everything has the same style or is ‘official’. Since these are made by artists, you’ll need to credit the creator of the icon, unless you pay a premium.
Icons8 is similar to Flaticon. Again, if you are using aartist-createdicons, you’ll need to credit the designer.
Wikimedia Commons is great if you’re looking for the official icons, free of charge. They have thousands of free, official logos that are part of Creative Commons. For example, this is the search result for “Xbox logo”.
How to add a License ithe n the readme file?
For most README files, this is usually considered the last part. It lets other developers know what they can and cannot do with your project.
We have different types of licenses depending on the kind of project you are working on. Depending on the one you will choose will determine the contributions your project gets.
The most common one is the GPL License which allows others to makemodificationsn to your code and use it for commercial purposes. If you need help choosing a licensee check out this link: https://choosealicense.com/
Up to this point what we have covered are the minimum requirements for a good README. But you might also want to consider adding the following sections to make it more eye-catching and interactive.
If anything I have missed, Just comment here.
Thanks for reading.

